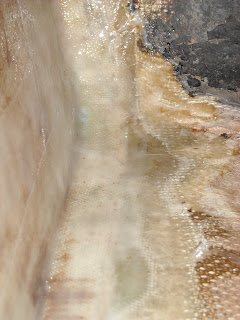
Well, it seems like everything turned out well with the epoxy. There are no air bubbles and it is hard as a rock. I am very pleased with the results.
Today, I removed 8 inches of material on the side of the hull. This is where I will be tabbing in woven roving fiberglass to the plywood and the side of the hull to increase strength and to bring it all together. Tomorrow I will tackle the left side and the bottom.
April 14, 2011
April 12, 2011
Transom Rebuild Begins
Over the weekend, we stopped by West Marine to pick up most of the supplies needed to start repairing the boat. We picked up West System Epoxy and Hardener, Microfiber filler, 6oz fiberglass cloth tape, fiberglass mat, and tools. Today, was my beginners class in fiberglassing 101. It is actually pretty easy once you get the hang of it. You just have to make sure everything is saturated and that there are no air bubbles. Especially in the corners. Tomorrow, I will find out if I was successful.
My only goal today was to add the 4" cloth tape to the inside corners of the transom. I did this for two reasons, to reinforce the corner because of all the material removed, and to smooth it out before adding the wood. Here is a before picture. Notice the unevenness on the left. This was a result of removing every last bit of rotted transom out. You can click on all of my pictures to enlarge it.
I started out by cleaning all surfaces with acetone then, dry fit the cloth tape.
I then mixed up a batch of epoxy and microfibers to peanut butter consistency so it will fill in the unevenness and cling to the vertical surfaces. With this batch, I coated all the surfaces, the width of the tape, all the way around. Once it was tacky, I placed the tape on top of the epoxy and used various tools like a chip brush and a small spreader to push it into the mix. Once it is in position, I used the rest of the batch to fully saturate it. This is called the 'wet method'.
After spending quite some time maneuvering, removing excess epoxy, making sure it stays tucked in the corner, etc., it started to get nice and tacky. It is at this point where I add a second layer of straight epoxy mix with no additives. This fully saturates it and gives me a chance to add addition fiberglass to some of the weak spots. Overall, I am pretty happy with the results. Like I said before, tomorrow I will see if I was successful at my first attempt working with epoxy and fiberglass. I just hope it cures properly. This area will be receiving more fiberglass/epoxy so I am not too concerned with strength. Next, will be some filling and fairing, followed by a layer of mat then, the new wood.
April 1, 2011
Final Transom Prep??
With the transom, it seems like one day takes longer than the next, even though I'm removing less material every time. I only had to remove around a 1/4" of material today but, somehow it took 3 hours. Very tedious work but, in the end very productive. I did manage to get rid of all the wood in the transom. Just some minor clean up and the transom is ready for new wood and epoxy.
Subscribe to:
Comments (Atom)


