March 31, 2011

More Transom Prep

Today was challenging. Since the transom was so wet, I decided to remove it all the way to the bottom of the hull. The tough part was that even though the wood was wet, it was actually in pretty good shape. This made it tough to cut and remove. I ending up doing it in small sections which made it time consuming. It actually might have took longer to remove this final 5 inches then it did the rest of the transom. Next, I will dig out the remaining 1/4" of wood left at the bottom and probably remove the 2" tabs I left on the sides. 


March 30, 2011

Transom Tear Out

Today, I spent removing all the rotted wood from the transom. Most of it was still wet and easy to remove. The challenging part was trying to remove the recently patched section. Some of this was still in good shape but underneath, it was soaked. I managed to remove everything down to the rear fiberglass skin. Luckily, it is in great shape and will make a nice base to add new wood.


 The wood grain you see here is just an imprint. No wood remains on the surface. It needs a final sanding to clean it up. The next step is to remove the final few inches of the bottom and sides.

March 22, 2011

Top Deck Separation


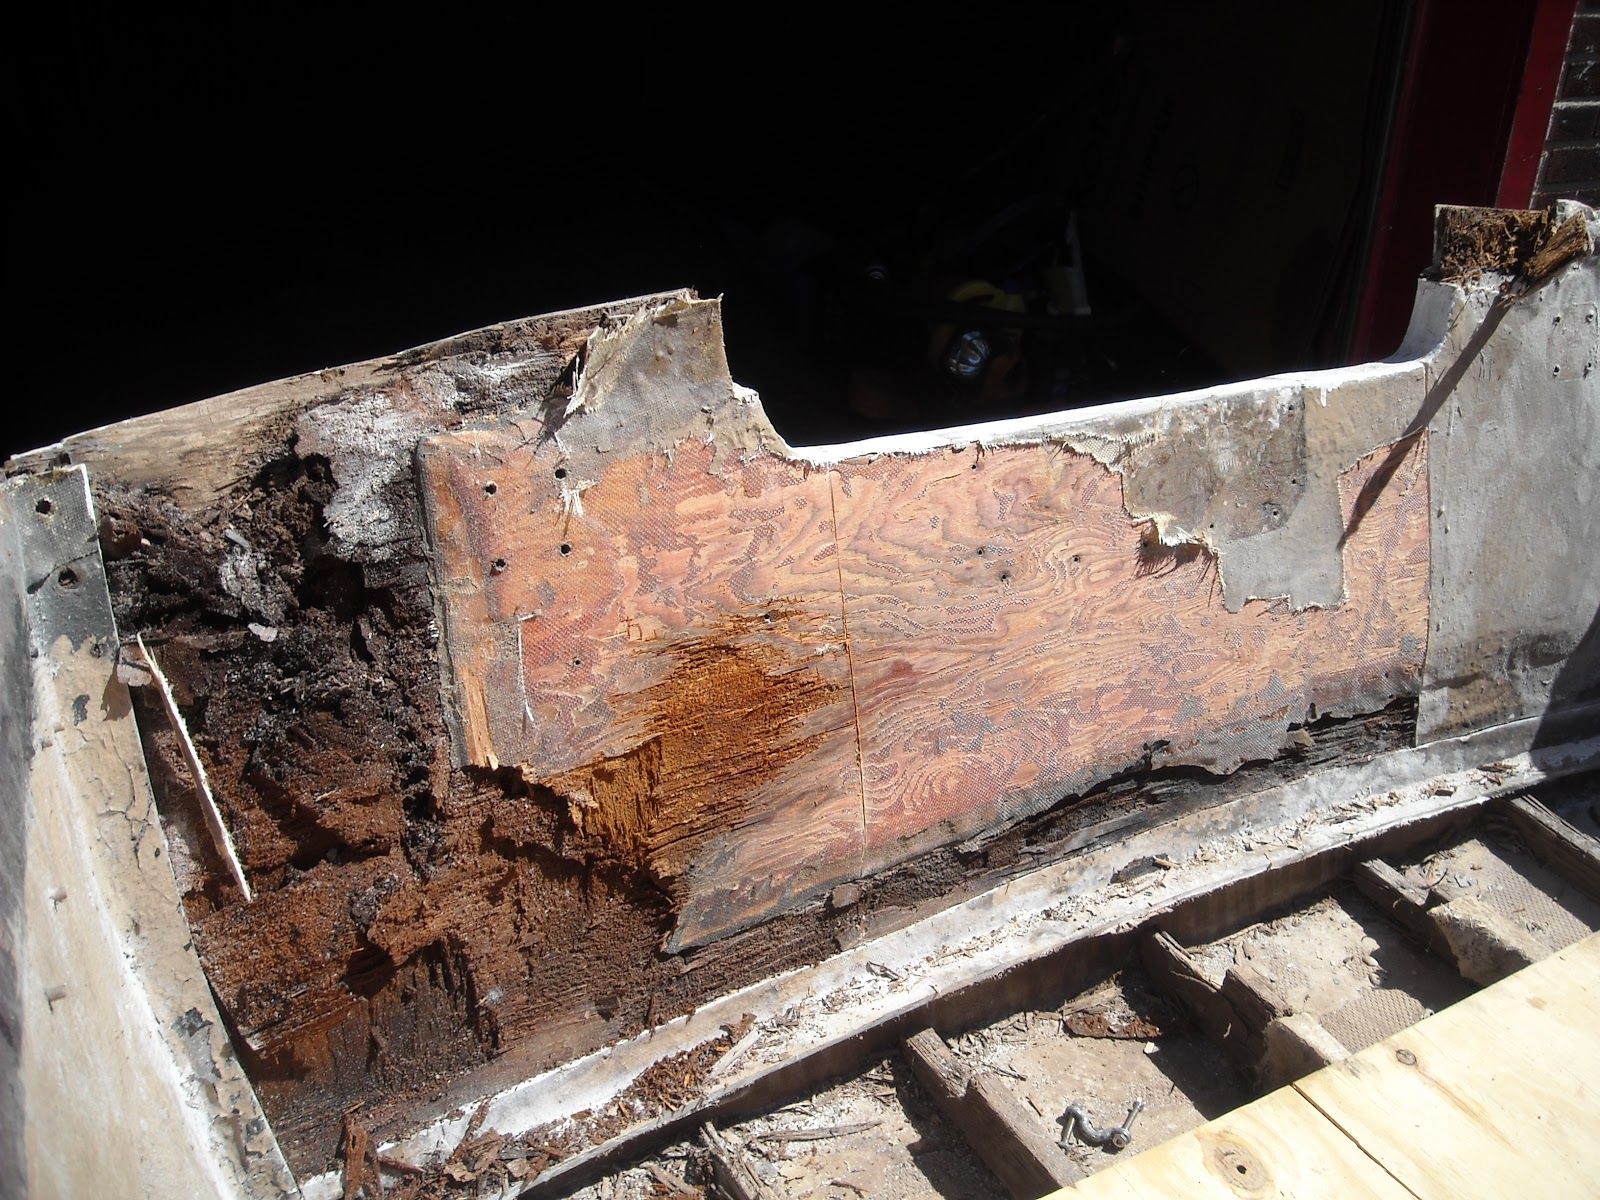
This weekend, we finally managed to remove the top shell/deck. After spending too much time trying to preserve the area where the top of the transom meets the underside of the top deck, she came up with the idea of just cutting it all off. This proved to be the easiest solution. It took only a few minutes to separate the two halves. It ends up, the transom was too rotted to try and keep it preserved anyway. The red line in the picture shows where I was trying to cut from the inside without much success. This was due the bonding used to join the two halves together. The yellow line shows where I used the multi tool to cut though from the outside. When I rebuild the transom, I will have to add roughly 3/4" to the top to make up for what I cut off. The other pictures shows the extent of the rot in the transom.


Once the top deck was removed, it was easy to finish up removing the rest of the floor. We used a combination of Harbor Freight's multi tool and angle grinder.

March 16, 2011

Floor Removal-March 12, 2011

 This past weekend, we started to remove the floor. As expected, we found a still wet plywood/fiberglass floor that was fairly easy to remove with bare hands. Stringers were wet and rotted and covered with chopped strand mat fiberglass. Everything will be removed and replaced. The next day we started to separate the top shell from the hull. It went well. We cut all tabbing around the boat but ran into difficultly at the transom. It seems to be bonded at the top of the transom and under the top shell. We ran out of time and sharp blades so it will have to wait a day or two.
Hardware Removal

Some of the first steps were for us to remove all hardware, steering/throttle, seats and engine. I built the engine stand myself with some inspiration of what other people have posted online. It worked out well with enough room for a water barrel in between for testing.


March 15, 2011