Glasspar Club Lido Restoration
August 22, 2011
June 14, 2011
Stringer Replacement Begins
Today I started taking out the old stringers.
I starting out by cutting the top off.
I then took out the old wood.
I then started to clean up the inside and outside of the existing fiberglass. Which by the way it is still very strong. I am going to put new, epoxy coated wood in then, recover the top with new fiberglass. By leaving the old glass, it should reduce time and cost to replace the wood.
More top deck prep
The top is really shaping up.
All of the old brown paint is gone. The blue is the gelcoat, grey is the primer.
I think it might be ready to be patched and primed.
Hull Strengthening
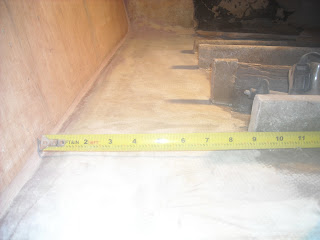
I finished cleaning up the inside of the hull. The delamination ended at around 53inches from the back.
I cut and prefit the fiberglass
You can't really see it but this is the fiberglass wet out with epoxy.
I added a layer of glass to the seat bracket too.All dry and cleaned up.
June 8, 2011
Transom and Hull prep
Today, started out with the intention of preparing the transom for another layer of fiberglass but my focus turned to the delamination of the fiberglass on the inside of the hull. I feel the transom is strong enough and the fabric would be better used strengthening the side of the hull.
You can't see it but, the inner layer of fiberglass is separated and 'bubbling'.
I removed the bad section and will add a new layer of the biaxial fiberglass to strengthen the side of the hull.
June 7, 2011
Fiberglass install
First layer is the 6", cut to fit. Then epoxied.
Sanded in between layers
I then added the 12" tabs on top of that.
After that was dry, I cleaned it up ready for the final coat.
Laying out one of the last layers.
All glued in with an additional layer over top
Top of Transom
This is the how the top of the transom looked after laying up the wood.
Started to clean it up.
All cleaned up
Final Layer
Clamped and glued final layer of wood.
Removed clamps and filled holes the next day.
All cleaned up
Coated with several layers of epoxy for waterproofing.
Too bad it will be covered with fiberglass. It looks so good.
May 18, 2011
Transom work continues
Removed the clamps, sanded and prepped the 4th layer. I will inject epoxy into all the holes before adding the final layer of marine plywood.
I cut out the final layer of wood today. I will be installing it soon.
I will be tabbing in the transom with multiple layers of 1708 Biaxial Fiberglass. The widest might be 8inches wide. I only had 5inches cleared on the bottom so today I increased it to about 9inches. Tabbing in the transom to the sides and bottom of the hull gives the transom strength. This is a before pic
.
This is after.
Subscribe to:
Posts (Atom)


